back!

I’m baaaack!! Haha sooo I got lazy and also really tired at nights in Japan so sorry.. I didn’t blog at all!! Also I didn’t always have internet connection.  Anyway, I figured I could just post the pictures later with nice descriptions and it would be the same… 😛  So.. hopefully I’ll post those soon!

Sadly I have to return to school in 4 days though.. boooo.  I will proceed to lounge on my couch watching TV until that time.

Published in: on January 9, 2009 at 1:53 am  Comments (1)  

Christmas Cookie #4: Praline-filled Almond Cookies

IMG_1305 by you.

Soo I just realized that I hadn’t typed this recipe up yet, and I’m still trying to pack for my Japan trip!!  Our flight is 7:45 am tomorrow morning….. meaning we have to leave our home at like 5:30! Ack.  Therefore, for now, there will be no recipe… sumimasen!  But, hopefully I will post it later after I get back.  For now, know that these are actually “Student Biscuits” in the King Arthur Flour Cookie Companion cookbook.  I made a smaller version of them, and instead of chocolate chip filling, I used my coffee hazelnut praline cream I got from Paris. 

The cookie is a wonderfully moist and chewy… with lots of almond flavor to pair with the butter.  Yum!!

IMG_1303 by you.

Oh yes…and as a heads up, I will try to post during my trip to Japan!  Our itinerary is Tokyo, then Takayama, Osaka, Hakone, and back to Tokyo.  Watch out for pictures of sights and more importantly…eats!

And one last Happy Holidays to all!

Published in: on December 25, 2008 at 10:29 pm  Leave a Comment  

Christmas Cookie #3: Triple Chocolate Cashew Crisps

IMG_1337 by you.

Yayy Merry Christmas!  I will attempt to finish up my cookie posts today…
This was the third cookie in my assortment.  The cookie is actually pretty great, considering I usually like the thick and moist chocolate chip cookies.  But, after I had City Bakery’s thin and chewy chocolate chip cookie in NY, I found a new light!  These cookies aren’t “crisp” as in they will break in half if you bend them… but the outside is crisp and still pretty chewy when you bite into it.  Buttery and delicious.

The only unfortunate thing about these cookies is that I realized how I don’t really like cashews in baked goods as much as I like other nuts… to be honest, I don’t even know why I had this half used bag of cashews in my house!  I just found them in the freezer and wanted to use them up, so I found this recipe from Claudia Fleming’s “The Last Course.”  Next time, I would probably make this with a different nut hehe…  I also had white chocolate to use up, and thought they would go great with the cashews, so I turned her recipe into a triple chocolate one.  Yum yum.

I actually at first tried to roll them into logs and cut slices like I usually like to do with other Christmas cookies… but alas, my rolls were too large in diameter and they spread like CRAZY… so I had to take my slices and divide them in half.  It was a big mess.  I’d say, just stick to rolling teaspoonfuls.

Recipes usually say they make way more cookies than they actually do… In this case, it says 10 dozen small cookies.  I dunno if it ACTUALLY makes 10 dozen, b/c I didn’t count mine.  But, I do know, that it made a heck of a lot of cookies!!! They didn’t seem to end…… Mainly b/c you have you shape them so small since they spread so much to make the thin chewy cookie.  So just be prepared!  You will be making lots and lots of cashew crisps.
IMG_1335 by you.

Triple Chocolate Cashew Crisps
Adapted from Claudia Fleming’s “The Last Course”
Makes about 10 dozen small cookies

2 1/2 cups toasted cashews
2 1/2 cups flour
1 tsp salt
1 cup (2 sticks, 8 oz.) unsalted butter
1 1/4 cups firmly packed light brown sugar
1 1/4 cups granulated sugar
1 tsp vanilla extract
Grated zest of 1 orange
2 large eggs
1 3/4 tsp baking soda
4 oz white chocolate, chopped
4 oz milk chocolate, chopped
4 oz semi-sweet chocolate, chopped

1.  Preheat oven to 350ºF.  Bake nuts until golden brown, 7 to 10 minutes, stirring occasionally.

2.  In a food processor, finely grind 1/2 cup of cashews with 1 tbsp flour.  Add ground nut mixture to remaining flour and mix in salt.  Corasely chop remaining 2 cups of nuts.

 3.  With an electric mixer, beat butter, brown sugar, and granulated sugar until creamy, about 2 minutes.  Add vanilla and orange zest and beat well to combine.  Add eggs one at a time, scraping down the sides of the bowl after each addition.

4.  In a small bowl, dissolve baking soda in 1 tsp walter.  Add mixture to butter mixture and beat to combine.  Add flour mixture in two batches, scraping down sides of bowl as necessary.  Stir in chocolate and remaining cashews.  Refrigerate dough for a couple of hours or overnight.

5.   Preheat oven to 325ºF.  Form heaping teaspoons of dough into balls and place them 2 inches apart on baking sheets lined with parchment paper.  Bake cookes until golden brown, about 15 min., rotating sheets halfway.  Store in airtight container.

Published in: on December 25, 2008 at 12:46 pm  Comments (1)  

Christmas Cookie #2: Macadamia Brittle Cookies with Fleur de Sel

IMG_1331 by you.

So here’s cookie #2 in my assortment… And might I add, it is probably my favorite! I should probably leave it last to be posted, but I felt like it was just THAT good that it must be posted next!

What you do is cook sugar until it is nice and caramelized, toss in toasted macadamia nuts, and spread it out on a baking pan and let it cool.  Then you take this wonderful macadamia brittle and grind it up in the food processor to become wonderful caramelized sugary bits in your cookie.  Just beat butter, sugar, mix in flour and this nut mixture.  Refrigerate, and shape.  What I did for my cookies was roll it out and cut it with a knife into slices.  With the leftover bits I formed them into oval shapes.  I realized after I had done this though, that there was no salt in the recipe! Or vanilla!  I was devastated… cookies with nuts and butter must have salt, at least! My macadamia nuts were salted, but tasting the dough (see, dough tasting really CAN be useful for quality control), it didn’t taste nearly salty enough.  But that’s when I remembered what a great ingredient fleur de sel is!  So, I whipped out my little container of fleur de sel that I got from King Arthur Flour, and sprinkled liberally all over the cookies.  It worked perfectly!

I thought I overbaked one batch, but it actually tasted wonderful.  So don’t be afraid to keep baking until very golden brown to ensure maximum caramelization and flavor!  

IMG_1323 by you.

After baking, I took leftover wafer chocolate that melts easily in a disposable decorator’s bag in the microwave, snipped off the tip, and drizzled liberally.

And that’s how you get one of the best buttery, thin, crisp, nutty, caramelized cookies ever!

IMG_1330 by you.


Macadamia Brittle Cookies with Fleur de Sel
Adapted from “Christmas Cookies from the Whimsical Bakehouse” by Kaye and Liv Hansen
Makes 6 to 7 dozen cookies

For the praline:
8 ounces (1 3/4 cups) macadamia nuts 
2/3 cup sugar

Line cooking sheet with parchment paper. Put aside.

Preheat the oven to 325 degrees. On a sheet pan, toast macadamia nuts for 8 minutes or until fragrant. When the nuts are cool, coarsely chop them, and set aside.

In a heavy saucepan, cook sugar over moderate heat. Shake the saucepan 2 or 3 times until the sugar melts, then cook without stirring until the sugar becomes dark caramel colored. Remove from the heat and add 1/2 cup of the toasted macadamia nuts (reserve the remaining nuts). Pour the praline nut mixture onto the prepared cookie sheet and let cool completely.

For the cookie dough: 
Praline mixture 
2 sticks unsalted butter, softened 
1/2 cup confectioners’ sugar
2 1/2 cups all-purpose flour
Fleur de sel, to sprinkle 

Break apart the praline into pieces and grind into a food processor. Add the remaining toasted macadamia nuts. Continue grinding until medium fine.

In a large bowl of an electric mixer at medium speed, cream butter and confectioner’s sugar. Add flour and the praline mixture. Mix. Divide dough into two disks and refrigerate for a couple hours or overnight.

Roll dough out to about 1/4 inch thickness, and cut into strips, or triangles, or whatever shapes you would like.  Sprinkle liberally with fleur de sel, and refrigerate to let the dough harden again.

Preheat oven to 325ºF, and place cookies an inch apart onto parchment lined cookie sheets.  Bake for 8 minutes, or until very golden brown. Let the cookies cool in the pans for 5 minutes, then transfer the cookies to a wire rack to cool completely.

Melt separately (by microwaving in plastic disposable decorator’s bag if possible):
1 cup cocoa wafer chocolate
1 cup white wafter chocolate

Snip ends off of bags, and drizzle the cookies with the chocolate. Refrigerate to set.  Store in airtight container.


IMG_1329-2 by you.

Published in: on December 23, 2008 at 5:34 pm  Comments (2)  

Christmas Cookies #1: Zaletti

IMG_1293 by you.

Yay for getting in an entry to Food Blogga’s “Eat Christmas Cookies” on the last possible day!  At least I have a few hours to go until the midnight cut off… heck, maybe I might even be able to post a few more before then!  I’m pretty late with Christmas cookie baking… I made 5 batches of dough yesterday and I will bake them all off today.  #1 comes from Gina De Palma’s “Dolce Italiano”… Polenta Cookies from the Veneto, or, Zaletti.

I wanted to make a cookie with cornmeal I had sitting around…and I had never had a cornmeal cookie before! Thus, these cookies were chosen. Plus, another feature I love about cookies… melted butter! I simply mixed everything in the same bowl that I used to melt the butter in.. and my cookie dough was ready.  Actually… these aren’t the directions given, but it was a lot easier to mix everything in one bowl, and hopefully it didn’t actually make a difference in the end result.

Also, the recipe originally calls for using currants and grappa, but I had neither of these…so, my version has dried blueberries and brandy.  Still turned out great though!

Cookie #1: Thumbs up! I would definitely make these again.
Add some Italian flair to your Christmas cookie assortment this year!

http://flickr.com/photos/33431834@N08/sets/72157611423492435/ 

And make sure to check out the rest of the round-up of festive holiday treats!
Part 1
Part 2 

[Food+Blogga+Cookie+Logo.JPEG]


IMG_1295 by you.

Polenta Cookies from the Veneto
Adapted from Gina De Palma’s “Dolce Italiano”
Makes 3 1/2 to 4 dozen cookies

3/4 cup dried currants (I used dried blueberries)
Grappa (or brandy) as needed
1 3/4 cups unbleached all·purpose flour 
1 cup instant or fine polenta (I used “medium grind” cornmeal and it was fine) 
3/4 cup granulated sugar, plus more for garnish 
1 teaspoon kosher salt 
1 teaspoon baking powder 
1 large egg 
1 large egg yolk 
1/2 cup (1 stick/4 ounces) unsalted butter, melted and cooled 
Finely grated zest of 1 lemon (I used 1/4 tsp lemon oil)

1. Place the dried fruit you have in a small saucepan, and pour enough brandy to come up at least halfway to the blueberries.  Heat until boiling, and then cover and take off the heat.  Set aside to let the blueberries plump and cool.

2. Place the flour, polenta, sugar, salt, and baking powder in the bowl of an electric mixer fitted with the paddle attachment and beat on low speed for 30 seconds to combine them. In a medium bowl, whisk together the egg and egg yolk to break them up, then whisk in the melted butter and lemon zest. Add the egg mixture to the dry ingredients and beat on medium speed to combine thoroughly, about 1 minute. Add the currants and their liquid and beat them into the dough on medium speed for about 30 seconds. Remove the dough from the bowl, flatten it into a disk, wrap it in plastic, and chill until it is firm enough to roll, about 1 hour.

3. Preheat the oven to 325°F. Lightly grease two baking sheets with nonstick cooking spray or butter or line them with parchment paper.

4. To form the cookies, use lightly floured fingers to pull off tablespoonfuls of dough and shape each one into a small, plump log about 1 1/2, inches long. Press the log down to flatten it and pinch the ends together to taper them, creating a diamond shape. Place the diamonds on the baking sheets, spaced 1 inch apart. Sprinkle the tops of the cookies lightly with granulated sugar.

5. Bake the cookies for 15 minutes, or until they are lightly golden brown around the edges and firm to the touch, rotating the sheets 180 degrees halfway through the baking time to ensure even browning. Allow the cookies to cool on the baking sheets for 1 or 2 minutes, then use a spatula to remove them gently to a wire rack to cool completely.

The cookies can be stored in an airtight container for up to 1 week.

Published in: on December 21, 2008 at 5:15 pm  Comments (2)  

Taiwanese Red Bean Trifle


img_1275
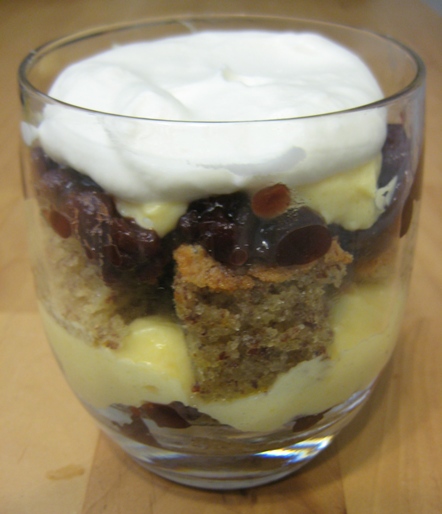
I was honored to have been personally invited by Ho Chie (of TaiwaneseAmerican.org) to create an “original Taiwanese American dessert” for the holidays…so here is what I came up with!

This is modeled after one of my favorite Taiwanese desserts… tzwah bing, or, shaved ice!  Actually, many cultures have their own variations on shaved ice desserts, but being Taiwanese, I’m afraid I will be forever biased and partial.  There are many different types of shaved ice you can get in Taiwan, and my favorites are the condensed milk with mango and condensed milk with red bean and those cute little Taiwanese puddings.  See the following:

YUM, right???
Now, some of you may not have be in Taiwan and have access to such a fine treat, or it is the middle of winter and you would rather not have an ice-based dessert…

But, that’s where this dessert comes in!  It is a heavenly cupful of almond cake soaked in milk tea, layered with condensed milk custard, lots of plump red bean, and topped off with whipped cream.

Every component can be as simple as you’d like, by substituting the almond cake with storebought pound cake or angel food cake, and the whipped cream by Cool Whip.  And the pudding layer is almost instant, using secret help from Jello Instant Vanilla pudding… but no one will be able to tell, since you’ll mix it with condensed milk, which I could eat plain from a spoon…  After you assemble the dessert (the only “hard” part of this dessert), let it sit at least overnight in the refrigerator, as it definitely tastes better and has a better texture after doing so.

I was actually a little scared about serving this to my mom’s co-workers, half of whom are Asian and the other Americans…  I wasn’t sure if it was too sweet for Asian tastes, and also the red bean too weird for American tastes.  But, fortunately, everyone loved it!  It’s hard to resist red bean…

In conclusion, you should make this dessert because:
1)  It’s really creamy!  (For some reason, I feel like holiday desserts are best when creamy…)
2) You can make it ahead! (In fact, is better when made ahead)
3) It makes a lot of servings with minimal effort!
4) Your family and friends (Taiwanese or otherwise) will be impressed and quite happy.

So, what are you waiting for?  Call out your inner pastry chef and construct this delightful dessert for the holidays!

For full step-by-step photos, check my flickr set!
http://flickr.com/photos/33431834@N08/sets/72157611294502346/ 

Taiwanese Red Bean Trifle/Cake
Makes around 12 servings (at least it did for me)
 

Almond Cake
IMG_1225 by you.

This almond cake is from Alice Medrich’s book “Pure Dessert.”  I used almond meal (basically very finely ground almonds) that I got from Trader Joe’s (it’s located next to the almonds), which gives it a more uniform and smooth texture.  If you can’t or don’t want to get almond meal, then use the food processor method with whole almonds.
As I said above, you can replace this with storebought pound cake or angel food cake to cut down on effort/time.  However, I really liked the almond cake in the finished dessert (actually, it’s really good to eat on its own too, if you want a nice almond cake!).  It’s moist, dense, and deeeelicious. 

1/2 cup (1 stick) unsalted butter, cut into several chunks and slightly softened
1 cup sugar
1/4 teaspoon salt
1/2 teaspoon pure almond extract  
3 large eggs  
3/4 cup plus 2 tablespoons (4 ounces) whole almonds, or 4 ounces almond meal
1/3 cup flour  
1/4 tsp baking powder 

Position a rack in the lower third of the oven and preheat to 350 degrees.
Line an 8-inch square baking pan with aluminum foil and spray with nonstick spray. 

Mixer method:
Beat butter on medium-high speed until smooth, then add sugar and beat until creamy and lightened.  Add salt and almond extract, and beat briefly to mix.  Add eggs one at a time, making sure each one is mixed in thoroughly before adding the next.  Add almond flour, flour, and baking powder, and mix on low speed only until everything is mixed.

Scrape batter into prepared pan and spread it evenly. Bake until cake is golden brown on top and a toothpick plunged into the center comes out clean, 35 to 40 minutes. Cool completely in pan on rack.

Food processor variation:
Place almonds, sugar, salt and almond extract in the bowl of a food processor and process until nuts are finely pulverized. Add eggs, butter and kirsch, if using, and pulse to blend thoroughly. Add flour and baking powder and pulse just until blended.  Proceed with above baking directions.


For the Condensed Milk Custard:
IMG_1233 by you.
1 package Jello instant vanilla pudding mix
1/2 cup milk
1 can sweetened condensed milk
1 cup of whipped cream or Cool Whip (reserve the rest for topping)

IMG_1241 by you.Put the pudding mix into a large bowl, and combine with the milk.  When smooth, stir in the condensed milk and 1 cup of Cool Whip.

IMG_1242 by you.

Now, for the assembly! You can either make large or mini versions…and you can make it like a cake or a trifle.  All up to you!
My pictures show mini cake and trifles.

You will need:
One can (18.34oz) of sweetened red beans (My brand was “Ogura An”)
IMG_1231 by you.
You probably won’t use the entire can… I didn’t.  But, you can turn the leftovers into another Taiwanese dessert, red bean soup!  Simply boil it with enough water added to make it a soup consistency.  Add tang yuan or tapioca pearls if you have them.  Otherwise, instant dessert!

Milk tea
IMG_1249 by you. 

 
For the trifle:
Cut small cubes of the cake and put them on the bottom of your serving container, trying to make the cake press against the sides so it will make a nice visible layer.  
Drizzle/brush/pour the milk tea over the cake cubes so that they’ll be nicely soaked. 
Spoon on a layer of the red bean to cover the cake cubes, and again, try to make the red bean show on the sides of the glass.
Spoon a nice layer of your creamy custard on top.
Repeat as much as you’d like!
Top with whipped cream. 
IMG_1276 by you. 

 
For the cake:
Cut out pieces of cake that will fit your glass, or, just cut the cake into little rectangles.
Slice the cake pieces in half,  and soak the bottom piece with milk tea, spoon the red bean on top, add a layer of custard, and top with the other half of the cake.  Again, soak in milk tea, add another custard layer, or go straight to the whipped cream!
IMG_1263 by you.

Feel free to be creative with how you construct your dessert.
And most importantly, enjoy!! 

IMG_1281 by you.

Published in: on December 20, 2008 at 10:08 pm  Leave a Comment  

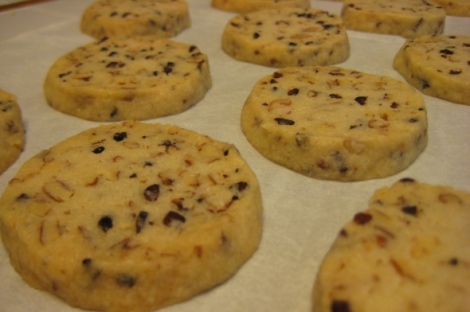
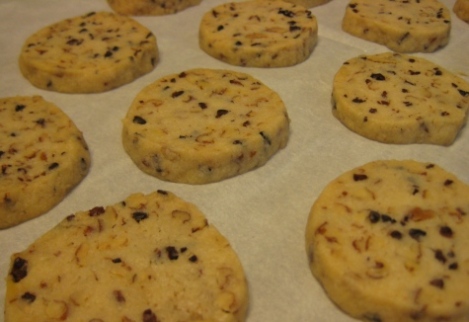
nibby pecan cookies

img_0023-2

So I actually made these cookies for Christmas LAST year, but I never posted about them..and they are such a wonderful cookie, especially for Christmas, that I felt it was necessary to post about them now!

I truly love Alice Medrich…her cookies, brownies, cakes, everything! have always turned out perfectly for me.  (Actually, I recently just made her new almond cake, that I’ll post about soon…)   These cookies in particular are one of my favorites because:
1) They’re slice and bake cookies, which are my favorite to make for Christmas since they’re really easy and quick, and are always buttery yet light at the same time.
2) They have an incredible flavor from the cocoa nibs.
3) They have an incredible texture from the cocoa nibs.
4) They’re so cute!  They look like little buttons.

Also, the alcohol in this recipe is optional, but I think that the brandy added so much to the flavor, even though you wouldn’t think it from only using 1 tbsp.  I think the alcohol extracted some special flavor from the cocoa nibs and pecans and blended it together somehow… So, whatever you have on hand, (rum, brandy, bourbon…), trust me, you want to use it!

I always thought “nibs” was a silly thing to call cocoa bean pieces…and truly wished that whoever named them had picked something a little more…respectable.  Especially when I try to tell someone who doesn’t know what they are about them.  I mean, it’s hard to believe that something called a “nib” is actually a wonderful gourmet product.  But, alas, if you get past the silliness, “nib” is actually the perfect name for these little pieces!  The texture really is “nibbly,” if you will…  Cocoa nibs are pretty widely used now, but, if you still haven’t tried it, at least find a chocolate bar with cocoa nibs in it and try it!  Make it your New Year’s resolution.

So, with all the millions of cookies to choose from for Christmas baking, I hope you will seriously consider this cookie!  Especially if you haven’t tried using cocoa nibs in a baked good yet, this is the perfect way to showcase their unique flavor and texture.


img_0019-2

Nibby Pecan Cookies
From Alice Medrich’s “Bittersweet”
Makes about 48 cookies

1 cup (3 1/2 ounces) pecan halves
2 sticks (8 ounces) butter, room temperature
3/4 cup granulated sugar
1/4 teaspoon salt
1 tbsp + 1tsp bourbon (I used brandy), optional
1 1/2 teaspoons vanilla extract
1/3 cup cocoa nibs
2 cups all-purpose flour

Preheat oven to 325ºF.  Toast the pecans for 7-8 minutes until they are fragrant and browned.  Let cool and chop into small pieces.

Cream butter, sugar, salt, bourbon (or brandy) and vanilla in a stand mixer on medium-high speed until the mixture is smooth and creamy, about 1-2 minutes.

Stir in the nibs and pecans and combine.  Add the flour and mix on low speed, or stir, just until the flour is incorporated.

Turn the dough out onto a piece of parchment and roll into a log about 2 inches in diameter and about 12 inches long.

Wrap the log of dough in parchment and chill in the refrigerator for a couple of hours, preferably overnight.

To bake the cookies:
Preheat the oven to 350 degrees.  Use a sharp knife to cut the log 1/4-inch thick slices.  Place cookies at least 1 1/2 inches apart on cookie sheets.

Bake for 12-14 minutes, rotating halfway, until cookies are light golden brown at the edges.  Let cool on pans for about 1 minute, then transfer to a wire rack to finish cooling.

The cookies taste best the next day, and will keep in an airtight container for at least a month.

Published in: on December 15, 2008 at 11:19 am  Leave a Comment  

whew!

img_1203

Oh man.. I haven’t posted in SO LONG!  I am a little ashamed of myself, actually.  But it’s winter break now, so hopefully I will post more normally now.  I just got back home to St. Louis, and it’s wonderful!! I have already visited Trader Joe’s and gotten lots of yummy treats to enjoy before I leave next Wednesday .. for.. JAPAN!!! My mom and I are going to visit my brother in Tokyo, and my dad is coming over from Taiwan, so it’ll be a little family reunion in Japan.  We’re going to stay in Tokyo for most of the time, but go to Osaka and a few day trips from Osaka as well.  Can’t wait!!! (If anybody has any suggestions as to what to see, and more importantly, where/what to EAT… then let me know!)

Anyway, let me do a bit of catch up work now… the picture is from Phileo!! I finally managed to go with my roommate this semester, after hearing about it in the summer and wanting to go THE ENTIRE SEMESTER!!! Seriously, you wouldn’t think it would be so difficult to go out to get frozen yogurt, lol.. but since it is out on 4th and South it is a little bit more work to get to.  We actually went after we went to Foster’s for a free cooking demonstration Mark Vetri was doing there, along with a book signing for his new book, “Il Viaggio di Vetri,” which we both got signed!  Mmmm we got to sample his sweet onion crepe and ricotta gnocchi, and both were AMAZING!  It has been my goal to go to Vetri (or at least Osteria) before I graduate, and now, I’ve made it my roommate’s goal too!  In the meanwhile, we have said we are going to try to make the sweet onion crepe on our own, so let’s see if that ever happens…

Anyway, on to Phileo! The great thing about Phileo is that they have so many different flavors to try!! The bad thing about Phileo is that they have so many different flavors to try!! I basically had to try every flavor, and my cup ended up being this massive mix of crazy colors and also ended up being quite expensive.  The flavors I remember getting were… blueberry, mango, strawberry, green tea, taro, pineapple, and cheesecake.  And then I got a lot of fruit toppings, which were pretty good for the most part (kiwi was not so great… but mango was good!) and they even had little mini mochi pieces!! All in all, a fun and yummy trip.  Although, I did get yelled at b/c apparently you aren’t supposed to take pictures of their machines?  We didn’t really understand why, but it’s okay, I took the picture before they got mad, and I didn’t delete it. HA!

Okay, that’s it for now.. hopefully I’ll post again soon!

Published in: on December 14, 2008 at 11:14 am  Leave a Comment  

back back back!

Oh man, back at school… How the heck did that happen?
But it’s good to be back. I went to Tampopo last night, and got the fresh tuna bi-bim-bap. Delicious!! Please try this dish immediately. http://www.tampoporestaurant.com

It’s on 21st, b/w Chestnut and Walnut, and conveniently close to Capogiros, where I got their espresso granita… I was really tempted to get their Blueberry Yogurt, but I wanted to try the granita after seeing pictures of it on Egullet. I was not disappointed in the slightest. Perfect for summer with the thickest whipped cream I have ever had. Seriously, I don’t even know how they did that. It comes out of this whipped cream machine that I have never seen before, but it is fantastic. I can’t wait until they open the Capogiros and Naked Chocolate Cafe on campus. Whoo!!!! Goodbyeeee money!

And then, of course, on the walk back, we had to stop by Trader Joe’s, my second trip there in the past week. I have an addiction to buying groceries at a rate far greater than the rate at which I consume them… So far my favorite purchases from TJ’s is their white bean hummus (my favorite hummus there so far, out of the millions that they have…), cocoa almonds, and Caribbean fruit floes. Yummmm.

I’m in the process of putting together my kitchen with pots and utensils and what not. Hopefully I can cook soon. In the meanwhile, I have TJ’s and my newly purchased 2009 Zagat guide that I have already started thumbing through…

Published in: on September 6, 2008 at 10:21 am  Leave a Comment  

gianduja bete noir

Hooray!! MCATs are over, finally. Unfortunately I have to wait 30 days to find out my score, but I’m really hoping that I won’t have to take those ever again. Now that I’m done with MCATs and work, I have complete and total freedom!!!!..for about 12 more days before I leave for school. But let’s not think about that!!

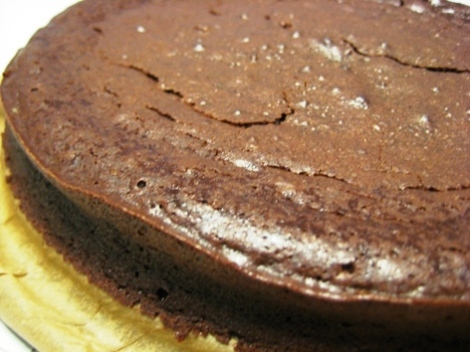
Here’s the wonderful chocolate hazelnut flourless chocolate cake I made for when my brother was still here. I used Kate Zuckerman’s Chocolate Bete Noir recipe, and replaced a lot of the butter for praline paste. It was my first time using praline paste, (and it won’t be my last, the can of it that I have is huge! Watch for how I use the remaining amount next!) but I love love love it. Chocolate hazelnut along with chocolate mint are my favorite combinations ever, so, naturally I needed to put this paste into a neverending-chocolate cake.

I haven’t made too many flourless cakes, but I knew I didn’t want one that was too overwhelming, or with a texture that seems like the cake is underbaked. I wanted a cake with a light, almost mousse-like texture. But without having to whip egg whites and yolks separately. I’m demanding, what can I say.

Fortunately, Kate’s cake was exactly that! So simple, without making you struggle to finish a slice. She does have an extra step where you boil the sugar into a simple syrup, which I don’t usually see in flourless cake recipes. But it’s a great idea, because it ensures that your final product is silky smooth, and no gritty crystals to speak of upon reserving after refrigeration.

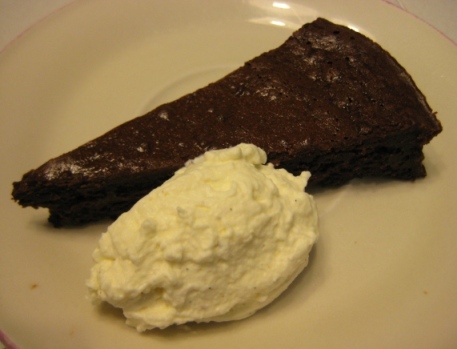
I really like this best when it is served room temperature, so that when you put a bite in your mouth, it almost melts away. That being said, it lasts forever in the refrigerator (ours almost two weeks…not because we didn’t like it, but we were 3 people with a lot of other desserts to eat too!). Just make sure to take it out 10-15 minutes before you want to serve it (Or you can serve it chilled for the firm, fudgelike experience). I only ask that you serve it with lightly sweetened whipped cream that has some Frangelico added to it. It transforms the cake into pure heaven.

Gianduja Bête Noir
Adapted from Kate Zuckerman’s “The Sweet Life”
Makes 10-12 servings

1 teaspoon vanilla extract
3/4 cup sugar
9 oz. dark bittersweet chocolate
3 eggs, at room temperature
1 egg yolk, at room temperature
1/8 teaspoon salt
2oz butter, at room temperature
5oz hazelnut praline paste, like this

1. Preheat the oven to 350°F. Line a 9-inch springform pan with parchment paper. Put sugar in a medium-sized saucepan and add 1/2 cup of water. Bring to a boil over medium- high heat. Once the mixture has come to a boil, remove the pan from the heat. Let the syrup rest for 10 minutes.

2. Chop the chocolate into 1/2-inch pieces and place in a medium bowl. Pour about half of the hot syrup over the chocolate and begin whisking the mixture gently. Add the remaining syrup and whisk until you have a shiny, thick chocolate sauce, about 2 minutes. (The chocolate will seize a bit when you first add the syrup, but as you add more of the syrup the cocoa particles and sugar will dissolve, making the mixture smooth again.)

3. Add the eggs and yolk one at a time, whisking well after each addition. Whisk in the salt – and the vanilla extract. Mix together the butter and hazelnut paste so the paste is thinned out, and add the mixture, one tablespoon at a time, whisking until all the butter/paste is incorporated and the batter is shiny and somewhat viscous.

4. At this point, you can proceed with baking the cake, or you can refrigerate the batter for up to 3 days. If you refrigerate the batter, you will need to let it sit out until it comes to room temperature.

5. Scrape the batter into the prepared pan and even out the surface with a spatula. Bake until the center of the cake is set and the top has cracked and developed a glossy, thin crust, around 40 minutes. If the center seems jiggly, bake for another 10 minutes or so.

6. Remove from the oven and cool for 1 hour before serving. Serve with Frangelico whipped cream.

Published in: on August 18, 2008 at 1:39 pm  Comments (3)